
“Kale continues to grow upward, and older, bottom leaves will eventually turn yellow and die off, so it’s best to harvest them before that happens.”
Living in an apartment doesn’t mean you can’t grow vegetables, and kale is one of the easiest ones to start with. A lot of people choose to grow vegetables inside (you can check out my article on how to grow kale indoors) but if you have a balcony, you might not even need any supplemental lighting, making the process even easier and cheaper.
Growing kale on a balcony has some advantages compared to growing it in a yard, such as almost no pests to deal with. That said, there are some things to consider before you dive into balcony gardening.
How to Grow Kale on a Balcony
1. Consider the location of your balcony and how much sun it gets. A south-facing balcony is optimal, but as long as you can get 4-6 hours of direct sun, your balcony should have more than enough light for your kale to grow.
Whether your balcony is enclosed in glass or it’s an outdoor balcony, you can have success with kale. However, if you are in a situation where your balcony isn’t getting enough light, your kale will grow a bit more slowly and might be leggy, especially when it’s young. You can use supplemental lighting to ensure your kale has enough light to grow into a lush, bushy plant.
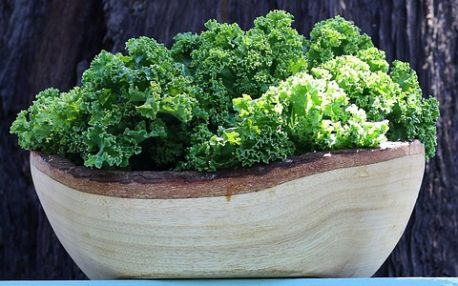
2. Kale can grow in any sized container, but it’s recommended to use at least a 2-gallon (7.5 L) container for decent-sized kale, but if you have the space, a 5-gallon (19 L) container at least 12 inches (30 cm) deep is ideal. Ensure your container is filled with well-draining potting mix and has adequate drainage holes.
If you’re just interested in harvesting baby kale, you can get away with even a 1-gallon (3.8 L) pot. Several kale plants in 1-gallon containers can give you a steady supply of baby kale throughout the year.
In my experience, curly varieties (especially Dwarf Curly kale) thrive in smaller containers, while Tuscan/Lacinato/Dinosaur kale has much smaller, narrower leaves when constrained to anything less than 2 gallons. But if you want to grow full-sized kale plants, anywhere from 2-5 gallons should be sufficient. Just make sure they have extra space around the pots, since kale can get very bushy, especially curly and Russian kale varieties.
3. Water your kale regularly and fertilize every 7 to 14 days with an all-purpose or high-nitrogen liquid fertilizer. You can also use a slow-release fertilizer and reapply as per the package instructions. Make sure your container has a saucer or reservoir underneath to catch excess water so it doesn’t run off your balcony and down below.
If your kale plants get stressed from very high heat or lack of water, it can cause your kale plants to bolt (grow a flower stalk) sooner. This is the end of your kale’s life cycle. Fortunately, unlike other leafy greens such as lettuce, spinach, arugula, etc., bolting doesn’t really make your kale taste bitter and the flower buds are totally edible, just like broccoli.
On the other hand, you don’t want to overwater your kale either, and this highlights the importance of having well-draining potting mix in your containers, not garden soil or topsoil which tend to hold onto lots of water. Roots need air, too, and having waterlogged roots can cause root rot, harming the health of your plant.
As to when exactly to water your kale, it depends entirely on the weather conditions, the size of the container, and the size of the plant. Large kale, especially grown in smaller containers, will deplete the potting mix of water much faster than seedlings or baby kale. As a rule of thumb, for a mature plant, if the first inch or so of soil is dry, give it a good inch or so of water. But, for tiny seedlings, make sure the potting mix stays moist as the roots are still shallow.
4. Consider companion planting and intercropping to maximize your balcony space; if growing kale in a 5-gallon container, you can plant other herbs and vegetables like green onions, spinach, Swiss chard, and cilantro around the edge.
If you decide to use a 5-gallon pot for a kale plant, you will immediately notice after transplanting that there is a lot of empty space around your seedling. Over the next two months, the kale plant will cover most of the container. However, you can still make use of that space by planting other vegetables like green onions, arugula, or spinach. One thing though is to avoid large vegetables like tomatoes, cucumbers, and peppers whose root systems will completely take over your container and choke out your kale. You should also avoid sprawling herbs like mint, which will also spread to fill out the entire container.
5. Harvest your kale regularly as it grows. Cut leaves off the bottom of the stalk but leave a few at the top so your kale can continue growing.
This is called the “cut-and-come-again” way of harvesting, and it’s used for other leafy vegetables like spinach and lettuce. You can see below a great video of how to harvest kale using this method:
Kale continues to grow upward, and older, bottom leaves will eventually turn yellow and die off, so it’s best to harvest them before that happens. Kale doesn’t bolt as quickly as lettuce or spinach, so you can harvest kale all season long from the same plants. And kale is also frost hardy down to 10°F (-12°C), so you could potentially grow it all year long. Kale actually tastes sweeter right after a frost so some say early spring and late fall are the best times to enjoy the best-tasting kale.