
Herbs are the plants in the garden that just keep giving. A healthy thyme plant will season countless dishes, and if you want to share your love of fresh thyme with others, you can propagate them with cuttings and give them away and use any extra cuttings to increase the size and sustainability of your herb garden.
Thyme easily grows from cuttings. There are different methods of propagating thyme but the one that increases the chance of success is rooting the cuttings in water. In less than a few weeks, you should see roots forming, after which you can transplant into a container or in the ground.
Follow me as I show you how easy it is to grow thyme from cuttings.
On this page:
Can You Just Plant Thyme Cuttings in Soil?
Taking your cuttings and just plopping them in the soil can (and does) work, but there is a higher risk of failure with that method. Usually when people propagate thyme and other herbs this way, they use potting mix or an inorganic medium like rockwool.
Directly planting in soil increases the chances that your cuttings will start rotting instead of growing roots. If you do decide to do this, always take multiple cuttings to increase your chances of success.
Another issue with this method is that you just don’t know if your thyme cuttings have started rooting. They can still look healthy above the surface while the stem in the soil is starting to succumb to disease and rot.
Rooting your cuttings in water means that you can see exactly when your cuttings have successfully rooted. In water, thyme cuttings can still rot, but there are ways to reduce this risk, as I’ll elaborate below.
How to Grow Thyme from Cuttings
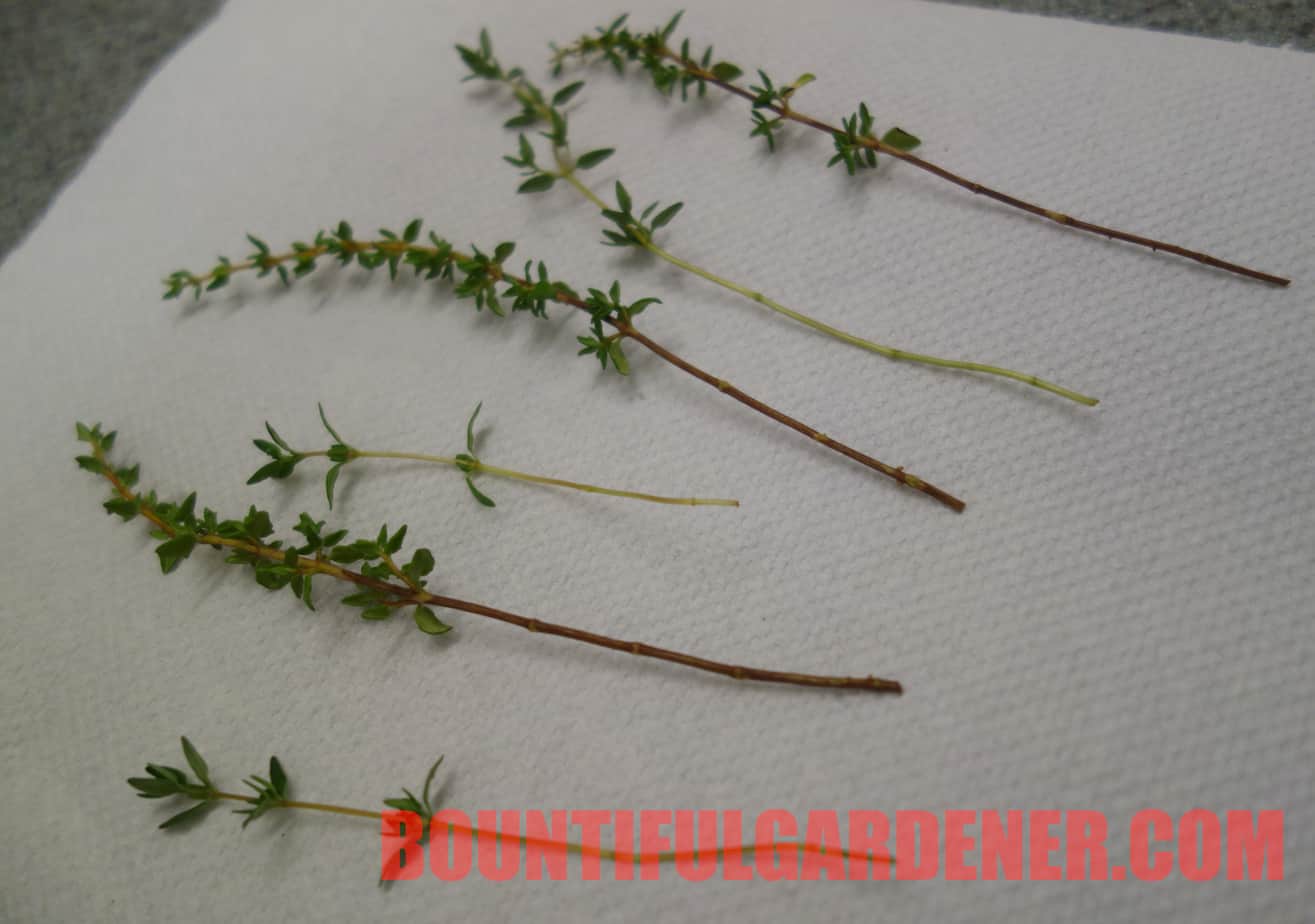
1. Take multiple cuttings to use from your thyme plant.
What’s that old saying? “One is none and two is one?” It’s always a good idea to make multiple cuttings of any kind of plant you want to propagate, just in case. Thyme is one of the easier herbs to propagate by cutting, but it’s good to cut a few extra for some insurance. And if all of them successfully root, you have more plants as a bonus to plant in your garden or give away to friends and family.
As to what type of branch makes the best cutting, ensure you have cuttings at least 3 inches long; I like making my cuttings a bit longer. I’ve taken a couple short cuttings as you can see below, but the longer ones are ideal.
You’ll also notice in the picture that some stems are more “green” and others are more woody. Thyme cuttings with green, tender stems are more likely to rot before growing roots. In my experiment, they all failed to grow roots.
One step I like to do but is not necessary is giving your thyme cuttings a quick rinse to wash away any “hitchhikers” from outside. Bringing pests into the house can easily get out of control since there are no natural predators to control them.
2. Remove the lower leaves and any side branches.
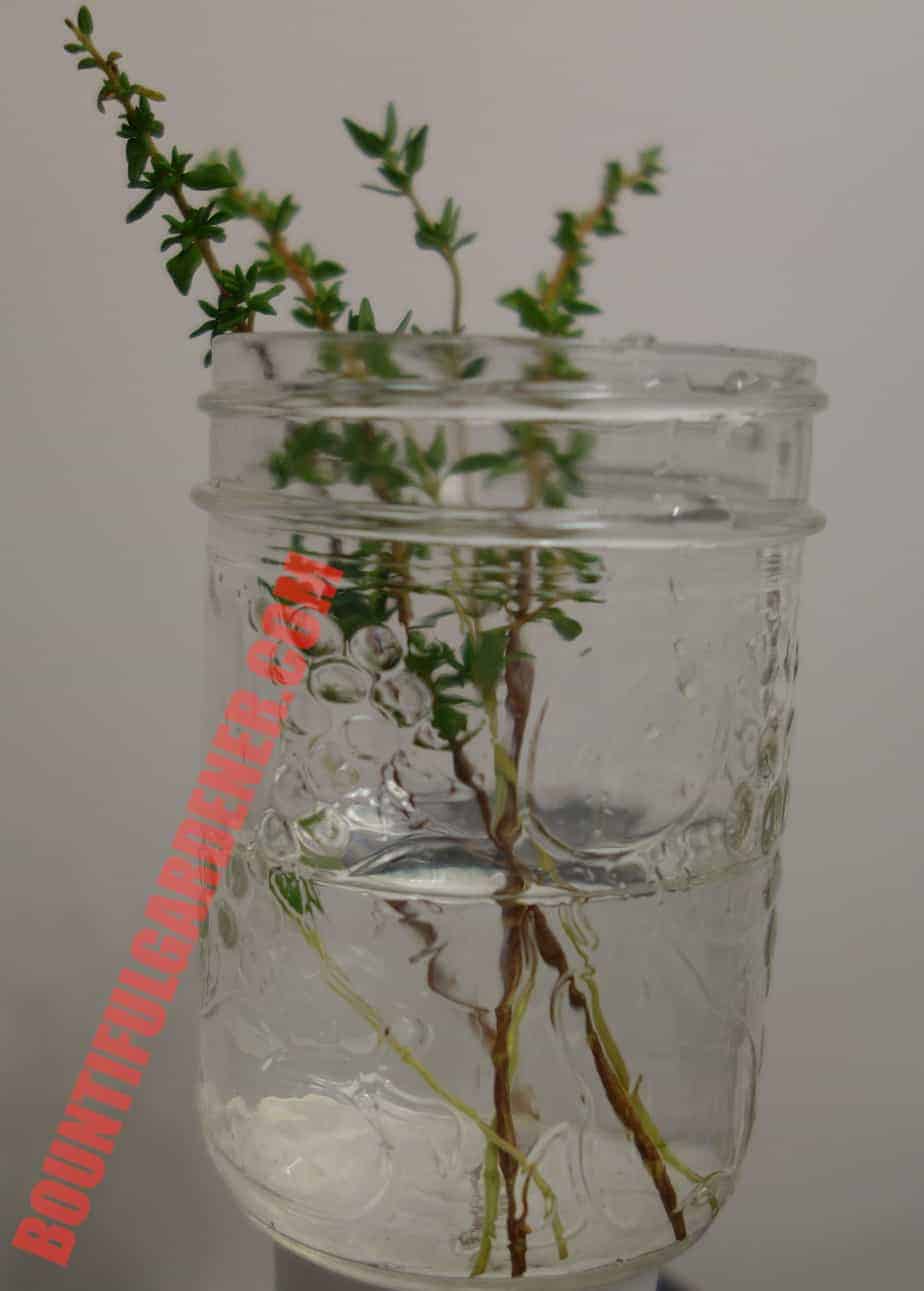 Place your cuttings into at least an inch to a couple inches of water, depending how long your cuttings are. You want at least one or two nodes submerged, and ideally no leaves under water.
Roots grow out of the little nodes along the stem where the leaves grow out. It’s important to remove any leaves and branches on the lower part of the cutting; you want a single stem with some leaves only at the top. How many leaves to keep is up to you, but I like to keep the top 25-50% of my thyme cuttings with their leaves.
The reason you remove the leaves is because you don’t want them drowning under the water and starting to rot. It will also stimulate the formation of new roots in the exposed nodes.
3. Place your thyme cuttings in water.
Because it will usually take at least a week to a few weeks, my secret to success is to change the water every few days or so to reduce the chance of your thyme cuttings rotting instead of rooting.
You do not need to give your cuttings much light. I usually just leave them indoors in a room with indirect light. Once your cuttings start to grow tiny roots, you can put them next to a window or under a grow light.

4. Plant your thyme cuttings when they start growing multiple roots.
I like to wait until there are multiple roots growing before I transplant, because it’s easy for one tiny root to break off during transplanting and then you’re back to square one.
Dig out a wide hole so the roots don’t bend as you transplant, then carefully stick your rooted thyme cutting in the hole and backfill gently with soil or potting mix. As long as the roots are buried in the soil or potting mix, your thyme cutting should survive the initial transplant shock.
An optional thing I like to do is give my planted thyme cuttings a good soaking of water right after transplanting. Thyme is pretty drought tolerant and doesn’t like very wet soil, but I find that initial soak gives the new roots time to adjust to growing outside the water and I see much less transplant shock.