
I’ve been growing peppers for many years, and I fondly remember always having a few sweet and hot peppers in our garden when I was a kid. But my first real dive into growing my own peppers from seed was growing Thai chili peppers.
Thai chili peppers are relatively compact, are stupidly prolific, and can even thrive and produce peppers in less than ideal conditions. And unless you like popping them in your mouth like candies (I’m not quite there yet!) one or two Thai chili plants can give you more than enough fresh hot peppers to last you all season with some left over for preserving for the winter.
On this page:
From Seed to Harvest – How Long Will It Take?
One of the reasons Thai chili peppers are one of my favorite varieties to grow is because they can give you a harvest earlier than other varieties like habaneros.
To give you an idea of how long it took before I started getting green Thai chili peppers, I sowed all my pepper seeds on March 17 and transplanted them outside on May 21. I started picking my first green Thai chili peppers in late June. So from seed to my first peppers took less than 4 months. For ripe, red Thai chili peppers, I had to wait a bit longer, until sometime in July.
Since I only harvest a few Thai chili peppers when I need them, I basically had a steady supply of Thai chili peppers until just before our first frost in October.
Harvesting Red Thai Chili Peppers vs. Green Thai Chili Peppers
Whether you decide to harvest red or green Thai chili peppers is entirely up to you. I think traditionally, they are picked and eaten green, but there are many uses of both.
Green Thai Chili Peppers
As mentioned above, green Thai chili peppers are more often used traditionally for cooking and eating fresh. The main reason, I believe, is that the peppers themselves still have some crisp, juicy flesh and the undeveloped seeds are softer and less bitter.
To harvest green Thai chili peppers, wait until they reach their full size, and then you can pick them. Very tiny, underripe Thai chili peppers will have a bitter flavor. I like to wait until they get just the first tinge of red before picking so I can get the most flavor, but really, you can harvest them at any time once they have grown to their final size (usually 2 to 4 inches, depending on the variety).
As to how you can use them, I like eating them raw with my food, but I will also chop them up to spice up stir-fries, eggs, and sauces.
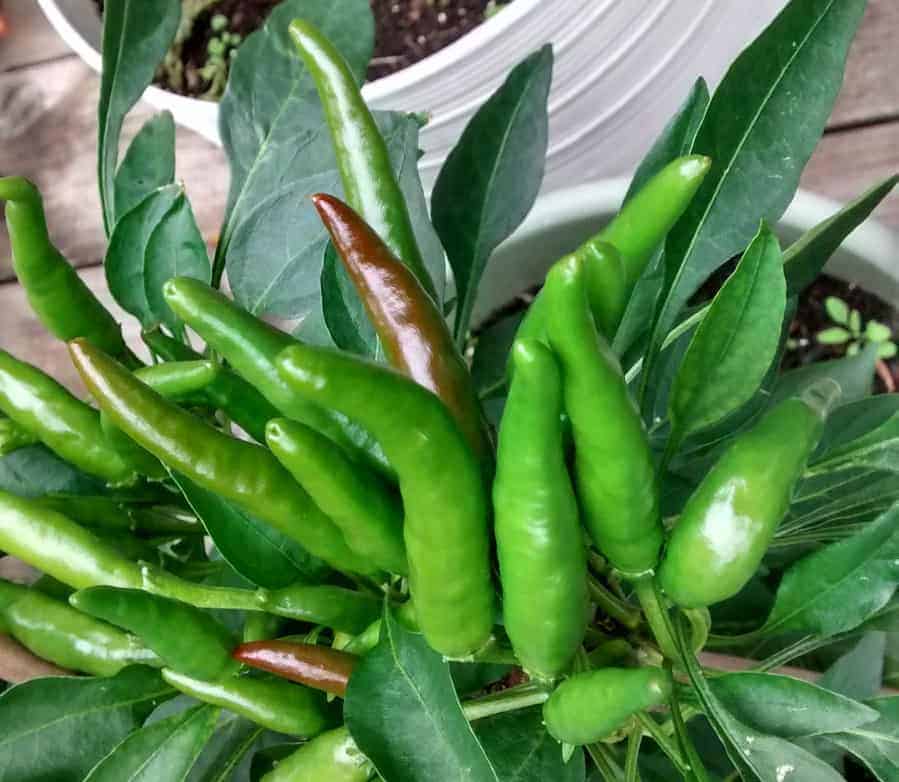
Red Thai Chili Peppers
If you harvest your Thai chili peppers after they’ve ripened completely, you can still use them as you would green ones. However, there are some differences.
First, your Thai chili peppers will have fully developed sweet/tangy flavor in the skin and reach their peak heat. However, the seeds will also be fully developed, and be tougher and more bitter.
Another thing I have noticed with different Thai varieties is the skin is very thin, so when they fully ripen, they will quickly soften and dry out on the plant if they are not picked right away.
If you want a ripe Thai pepper that still gives a nice crunch, pick either right before or right after it turns red. I find picking Thai peppers when they are half red or just starting to ripen gives the best of both worlds – better flavor and aroma but still having that nice crunch when eaten fresh or chopped up into dishes.
If you are saving Thai chili peppers to dry them, you should pick them when they are fully ripe. Often, I will just let them start drying on the plant before picking them and drying them indoors.
How to Store Your Harvested Thai Chili Peppers
There is a plethora of ways to store peppers, but for Thai chili peppers, the best ways to store them in my opinion, is by drying or freezing.
Drying Thai Chili Peppers
You can dry Thai chili peppers very easily, and often they will start drying on the plant after they ripen. Because the skin is very thin, you can often dry them indoors, laid out on a paper towel. But to speed up the process, you can use a food dehydrator on the lowest setting or an oven, kept at the lowest temperature (I can set mine to 145°F/63°C) until they are bone dry, brittle, and can snap into pieces. If they’re bendy and have a leather-like texture, they are not fully dry yet. To be on the safe side, spread your oven-drying over a couple days if necessary so the oven isn’t left on while you sleep.
After drying your Thai chilis, you can store them in an airtight container, like a mason jar, and keep them in a cool, dark place. You can also grind them up into chili powder, or if you want, you can tie them on a string or needle a thread through them so you can hang them up in your kitchen.
If your Thai chilis are completely dry and kept in an airtight container, they will last years. I still have a jar of whole Thai chili peppers from a few years ago that I use when I want to throw a few pods into a stew for extra heat.
Freezing Thai Chili Peppers
If you prefer using your Thai chili peppers in omelettes, fresh sauces, stir-fries, etc. you can freeze them when they’re green or red. The skin is so thin that the texture won’t get too soft like other peppers do after they’ve been in the freezer.
Use a resealable bag and squeeze the air out from it to keep your chilis tasting fresh in the deep winter months.
Thai chili peppers will last almost indefinitely in the freezer, but much like everything else, the taste and quality will deteriorate over time.
Other Methods of Preserving Thai Chili Peppers
Another way to store them is to preserve them in oil, usually by drying them first, then submerging them in oil, like olive oil. If you use this method, it’s recommended to process them in a pressure canner as an extra safety measure to prevent botulism.
An easier method is to pickle them, which requires no pressure cooker. You want to use 2 cups white or apple cider vinegar per 1 cup water, and about half a tablespoon of salt per 2 cups of vinegar. CSU Extension gives a good general recipe for pickling peppers, but most recipes will call for a 2:1 vinegar-to-water ratio. You can make a “quick pickle” recipe with no processing but requires refrigeration, but to store it in the pantry, you can just process your jars it in a water bath for 10-15 minutes (add 5 minutes if you live up in a mountainous area).